Welcome to the vibrant world of oil painting! If you’re a beginner, you might feel a mix of excitement and intimidation, and that’s perfectly normal. Oil painting is an art form that’s been loved for centuries by masters like Van Gogh and Rembrandt. The best part? You don’t need to be a pro to get started. With the right tools, techniques, and a little patience, you can create stunning pieces that reflect your unique style.
In this guide, we’ll cover everything from the basics of oil painting to beginner-friendly techniques that will help you gain confidence and develop your skills.

Why Choose Oil Painting?

Before diving into the techniques, let’s quickly go over why oil painting is such a popular medium:
- Vibrant Colors: Oil paints have a richness that other mediums can’t match.
- Blendability: They stay wet longer, allowing you to blend colors seamlessly.
- Versatility: From thin glazes to thick textures, you can achieve a variety of effects.
- Longevity: Oil paintings are durable and stand the test of time.
Getting Started: Essential Tools and Materials
Before you start painting, make sure you have the right supplies. Here’s a quick checklist:
1. Oil Paints
Invest in a beginner set with basic colors like:
- Titanium White
- Ultramarine Blue
- Burnt Umber
- Cadmium Red
- Cadmium Yellow
- Alizarin Crimson
2. Brushes
Choose a variety of shapes and sizes, including:
- Flat Brushes: Great for broad strokes and blending.
- Round Brushes: Perfect for details.
- Fan Brushes: Used for softening edges and creating texture.
3. Canvas
Start with pre-stretched canvases or canvas boards. These are affordable and beginner-friendly.
4. Palette
A wooden or plastic palette is essential for mixing colors.
5. Palette Knife
Used for mixing paint and creating textured effects.
6. Mediums
- Linseed Oil: Slows drying and enhances blending.
- Turpentine: Thins paint for washes or underpainting.
7. Easel
While not mandatory, an easel can help you work comfortably and maintain good posture.
8. Rags and Paper Towels
Useful for cleaning brushes and correcting mistakes.
9. Brush Cleaner
A jar of turpentine or dedicated brush cleaner will keep your brushes in good shape.
Prepping Your Canvas
Before you start painting, it’s important to prep your canvas:
- Prime with Gesso: Most canvases come pre-primed, but adding an extra layer of gesso can improve the surface texture.
- Sketch Your Idea: Lightly sketch your design using a pencil or charcoal.
- Tone the Canvas: Apply a thin layer of neutral-colored paint (like Burnt Umber mixed with linseed oil) to tone the canvas. This reduces the starkness of the white background and makes it easier to judge colors.
Basic Techniques for Beginners
Now that your canvas is ready, let’s dive into the techniques that will help you create your first masterpiece.
1. Wet-on-Wet Technique
The wet-on-wet technique involves applying wet paint on top of wet layers. It’s perfect for beginners because it allows for smooth blending.
Steps:
- Start with a thin layer of paint mixed with linseed oil.
- While the layer is still wet, apply more colors and blend them using a soft brush.
- Experiment with gradients and transitions, such as creating a sunset or soft clouds.
2. Underpainting
Underpainting is like laying the foundation for your artwork. It helps you define the composition and values before adding color.
Steps:
- Use a thinned-down paint (e.g., Burnt Umber or Raw Sienna) to sketch the basic shapes and shadows.
- Let it dry before layering on colors.
3. Glazing
Glazing involves applying thin, transparent layers of paint to create depth and luminosity.
Steps:
- Mix paint with a glazing medium to make it more transparent.
- Apply thin layers over dry areas of your painting.
- Build up the layers gradually to enhance depth.
4. Dry Brushing
This technique creates a textured, scratchy effect.
Steps:
- Use a dry brush with minimal paint.
- Lightly drag the brush across the surface of the canvas.
- This technique is great for adding highlights or texture to landscapes.
5. Scumbling
Scumbling is a way to create a hazy, soft effect by applying a thin, broken layer of paint.
Steps:
- Use a dry brush with a small amount of paint.
- Apply it lightly over a dry layer of paint.
- Perfect for creating clouds, mist, or soft edges.
6. Blending
Blending is essential for smooth transitions and realistic effects.
Steps:
- Apply two colors next to each other on the canvas.
- Use a clean, soft brush to blend the edges together.
- Work quickly, as blending is easier when the paint is wet.
7. Palette Knife Techniques
Palette knives aren’t just for mixing paint—they’re also fantastic for creating bold textures.
Steps:
- Scoop up paint with the knife.
- Spread it onto the canvas like butter on toast.
- Experiment with scraping and layering for unique effects.
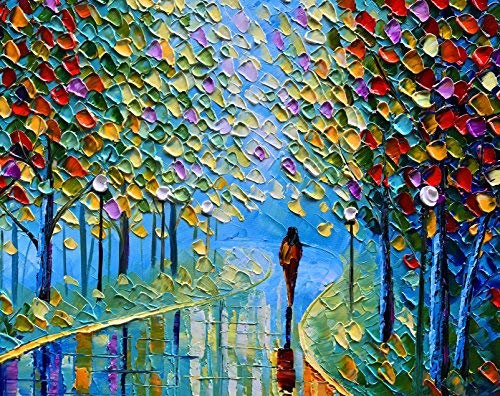
8. Impasto
Impasto is all about texture. Thick layers of paint create a three-dimensional effect.
Steps:
- Use undiluted paint straight from the tube.
- Apply it thickly with a brush or palette knife.
- Add bold strokes to give your painting a dramatic look.
9. Sgraffito
Sgraffito is a fun technique where you scratch into wet paint to reveal the layer underneath.
Steps:
- Apply a thick layer of paint to the canvas.
- Use a palette knife, brush handle, or even your fingernail to scratch designs into the paint.
10. Alla Prima (Direct Painting)
Alla prima, or “wet-on-wet,” involves completing a painting in one sitting. It’s great for beginners who want to loosen up and focus on capturing the moment.
How to Do It:
- Skip the underpainting and start directly with your colors.
- Work quickly and blend as you go.
- Use a limited color palette to simplify the process.
11. Using Complementary Colors
Learn the basics of color theory and apply it to your work. Complementary colors (opposites on the color wheel) create striking contrasts and make your paintings pop.
Examples:
- Blue and orange for vibrant sunsets.
- Red and green for dramatic floral pieces.
- Yellow and purple for a moody, artistic vibe.
12. Create Movement
Abstract and dynamic paintings come to life when you add a sense of movement. This can be achieved through diagonal strokes, swirls, or flowing lines that guide the viewer’s eye across the canvas.
Tips:
- Use curved brushes or flowing strokes.
- Incorporate lighter colors along “paths” to create a sense of direction.
13. Work in Series
Choose a theme—like seasons, emotions, or a specific subject—and create a collection of smaller paintings. Working in a series helps you explore your style and deepen your understanding of your subject.
14. Texture Experiments
Experiment with unusual materials to create textures:
- Sand or Sawdust: Mix with your paint for gritty effects.
- Fabric Scraps: Glue them to your canvas before painting.
- Plastic Wrap: Use it to imprint patterns onto wet paint.
15. Varnishing Your Painting
Once your painting is complete and fully dry (which can take weeks or months), consider varnishing it to protect the surface and enhance its appearance.
Steps:
- Use a soft brush to apply varnish evenly across the canvas.
- Allow it to dry in a dust-free environment.
- Use gloss varnish for a shiny finish or matte varnish for a softer look.
Keeping the Momentum: Building Confidence as a Beginner
Learning oil painting can be a slow but rewarding process. Here’s how to keep improving and enjoying your journey:
1. Watch Tutorials
There’s a wealth of free content online from professional artists who share step-by-step tutorials. These can be a goldmine for learning specific techniques.
2. Practice Regularly
Set aside a little time each week to paint. Even 30 minutes of practice can make a big difference in your confidence and skill level.
3. Study the Masters
Take inspiration from great artists like Monet, Van Gogh, or Georgia O’Keeffe. Look closely at their brushwork, color choices, and compositions.
4. Join a Community
Connect with other beginner painters through local workshops, art classes, or online forums. Sharing your work and learning from others is a great way to grow.
5. Experiment Without Fear
Mistakes are part of the process. Don’t hesitate to try bold techniques or unusual ideas. Some of your greatest discoveries might come from accidents!
Common Mistakes Beginners Make (and How to Avoid Them)
- Using Too Much Paint
- Start with small amounts. You can always add more.
- Overblending
- Avoid blending too much, as it can muddy your colors.
- Not Letting Layers Dry
- Be patient! Rushing can cause cracking or unwanted smudges.
- Skipping the Sketch
- Planning your composition saves time and frustration later.
Tips for Success
- Start Simple: Don’t try to paint a masterpiece right away. Focus on practicing techniques.
- Work on Small Canvases: Smaller surfaces are less intimidating and easier to complete.
- Experiment: Try new techniques and tools without worrying about the final result.
- Take Breaks: Step back often to view your painting from a distance.
- Have Fun: Enjoy the process and embrace mistakes as part of your learning journey.
The Beauty of Your Journey
Oil painting is about more than just creating art—it’s a deeply personal and expressive experience. Every brushstroke you make is a reflection of your growth and creativity. So, don’t be afraid to take your time, try new things, and most importantly, enjoy the process.
Remember, every masterpiece starts with a single brushstroke. Today is your chance to pick up that brush and begin your own artistic adventure. With practice, patience, and a little inspiration, the world of oil painting is yours to explore.
Oil painting is a rewarding and versatile medium that allows you to express yourself in endless ways. By mastering these beginner techniques, you’ll build a strong foundation and gain the confidence to experiment and find your unique style.
So grab your brushes, mix those colors, and start creating! With practice and patience, you’ll surprise yourself with what you can achieve. Remember, every great artist started somewhere—and today is the perfect day for you to begin.
Happy painting! 🎨


